ANDREW de MORAY WILLIAM WALLACE'S FORGOTTEN SOLDIER |
 |
In the month of March 1297, young Andrew de Moray, only recently married, escaped from imprisonment by Edward I in England. His father, Sir Andrew de Moray, and his uncle were still held in the Tower of London, along with many other Scottish knights who had earlier shown a tendency to revolt, and had been captured and taken to England as assurance against further uprisings. He headed back to the family lands in Moray, and raised the standard of revolt. Inverness Castle was at this time in the hands of the English, and the leader of the Inverness burgesses was a man named Alexander Pilche. He led a force of the burgesses to Avoch Castle, where the revolt was being raised, and joined de Moray, becoming his trusted lieutenant. The force began a series of raids against the English in the area, and caused so much strife that Edward's Lieutenant of Moray, Sir Reginald le Chen, sent a plea to Edward for help in putting down the uprising. Following a conference at Inverness Castle with his subordinates, de Moray's force besieged Urquhart Castle. Thanks to an influx of provisions, the siege of Urquhart Castle did not succeed, and Andrew's army left the area having neither won nor lost. |
| De Moray now divided his forces into two separate bands, one operating out of Avoch Castle and the other from Balconie Castle, which had been taken from the Countess of Ross. She had sided with the English, her husband being held hostage in the Tower of London, and she it was who had re-supplied Urquhart Castle. This was her payment for choosing the wrong side! De Moray's army wreaked havoc on the English positions in the North, killing many of Edward's officials, or capturing them and throwing them into prison. At the same time, Robert Bruce was operating against the English in Ayrshire, and William Wallace was becoming a factor in Argyll. |
| Meanwhile, Edward I made a deal with some of the Scottish knights and nobles in his prisons. He was about to embark on a military campaign to Flanders, so he offered the captive Scots their parole if they agreed to accompany his army. Many of them took him up on his offer, among them John Comyn, Earl of Buchan, John Comyn of Badenoch, Alexander de Balliol, Alexander, Earl of Menteith, Reginald de Crauford, and a few others. These departed for Scotland under safe conduct to make themselves ready to accompany Edward on his campaign to Flanders. En route, they were overtaken by a messenger sent to catch up with them and deliver Edward's orders to raise all their forces and suppress the revolt led by Andrew de Moray. The Comyns were in a dilemma over this, King John (Balliol) having recently resigned the throne, and the Comyns being in contention with the Bruces over the line of succession. They decided to carry out Edwards orders following a meeting in Aberdeen, Bruce and Sir William Douglas having been recently defeated in battle at Ayr. |
De Moray was not idle whilst all this unfolded, having burnt the Castle of Duffus, and then moved to Boharm, to await the oncoming English army. His forces positioned themselves on a wooded hillside above a ford on the River Spey, and waited to ambush their foes. On seeing the size of the force sent against them, they decided to withdraw without battle, and shadowed the array from Elgin to Inverness. Safe for the time being within the walls of Inverness Castle, Edward's cohorts gathered to themselves the remaining forces in the Highlands still considered loyal to his cause, principally Sir William de Fitzwarine, Constable of Urquhart Castle, John of the Aird, and the Countess of Ross, with their respective feudal retainers. Here again, as with the Comyns and Mar, the enthusiasm of these new recruits for the task at hand was doubtful. Aberdeenshire had been left denuded of English forces whilst all this had been going on, and the Scots there rose against the invaders. The Comyns and Sir Gartenet of Mar readily agreed to abandon the mission against their kinsman and set out with their followers for Aberdeen. Andrew de Moray watched the last of the English forces leave Inverness, and immediately set about recapturing the castles held for Edward in the region, including Inverness, Urquhart, Nairn, Forres and Elgin. They even captured Sir Reginald le Chen, Edward's guardian of Moray, and held him prisoner for a time. Aberdeen fell to the rebels, the Scots were in complete control of the north east, and all the direct result of Andrew de Moray's brave actions.The Lothians were now under English control, and Robert Bruce, with Sir WilliamDouglas, Sir Alexander Lindsay, |
| and theBishop of Glasgow (Wishart), had capitulated to the English without a sword being raised at Irvine in Ayrshire on 7 July, 1297. The large English force which precipitated Bruce's surrender had joined up with another English army coming north through the Lothians. Andrew de Moray and William Wallace now represented the only two principal forces in opposition to Edward, and the Battle of Stirling Bridge was just a few short weeks away. Whilst de Moray was conducting his campaign in the north, Wallace had led his forces out of Selkirk forest and into Argyll to face an army under MacFadyen, an Irish ally of Edward whose band included a large number of Irish and smaller number of Scots. After an arduous march, Wallace's men fell on MacFadyen's forces near Loch Dochart. Wallace prevailed, and MacFadyen escaped with 15 men to a cave at Craigmore. Duncan of Lorne, a loyal ally of Wallace, pursued him there and slaughtered MacFadyen and his men. |
 |
Following the MacFadyen affair, Wallace marched his men through the central Highlands to Perth and won the city back for Scotland using siege engines for the first time. Thence, he advanced on Cupar and continued north for Aberdeen. Along the way, he attacked Dunnottar castle, where he ordered the slaughter of 4,000 English troops who were trying to escape. Wallace reached Aberdeen when the Scottish uprising was in full flower. Sir Henry de Latham, the Englishman who had been left in charge of Aberdeen Castle, had gone over to the Scottish side and put the castle in the hands of the Scots. When Wallace arrived, the English were preparing to leave by sea, but Wallace's army fell on the English fleet at low tide and destroyed the ships laden with English troops and supplies. |
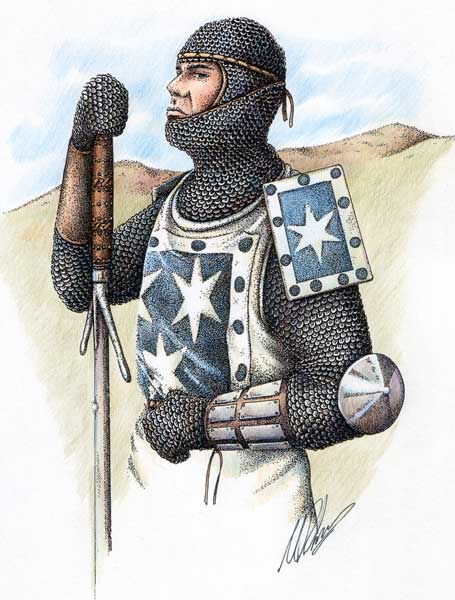
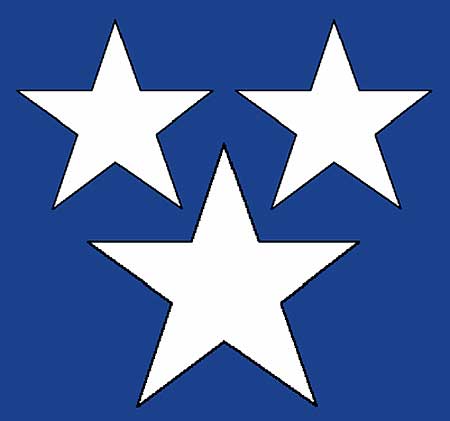
Wallace and his army then marched south again to lay siege to Dundee, which was more stoutly defended than either Perth or Aberdeen. It was at this point, in August of 1297, that Earl Warrene bestirred himself at Edward's urging to bring the Scottish uprising to an end. He assembled a large army of mounted knights and foot soldiers and marched for Stirling, intending to reinforce this very strategic and nearly impregnable fortress and thence to relieve the siege of Dundee. On hearing that the English army was marching north from the borders, Wallace took most of his men and departed the siege, leaving Alexander Scrymgeour and a small force behind to finish the job. Wallace and de Moray must have been in constant communication as these events unfolded, probably with the assistance of the Scottish churchmen who played such an important role in the War of Independence. The two armies joined together at some point (time and place still unknown) and took up battle positions north of the Forth near Stirling. Most historians attribute the strategy of the battle to young Andrew de Moray. While this is pure speculation, there is some reason to believe it was de Moray who positioned the Scottish forces to take advantage of the bridge and swampy ground where the English army went down. Pitched battle was not Wallace's way; he was a guerrilla fighter. De Moray, in spite of his youth and lack of direct experience, would perhaps have known more about large battle strategy as a member of the high nobility. Wallace's poor choice of ground at Falkirk a year later is often cited as proof that it was de Moray who worked out the battle plan at Stirling Bridge. Whatever the case, the two commanders carried Scotland on their youthful shoulders on that day, 11 September, 1297. They had little support from the magnates of Scotland. They had only a smattering of lesser nobles and a large force of the commoners of the realm to command. |
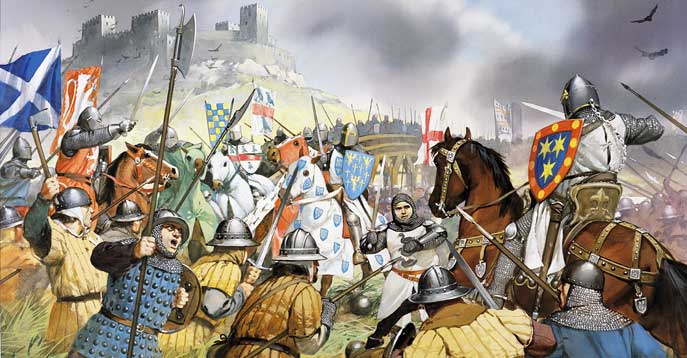 |
With 13,000 heavy horse and 60,000 foot, the English forces should have easily carried the day against the ragtag forces of de Moray and Wallace. However, the arrogance of the corpulent churchman Cressingham overruled the cautious deliberations of Warrene, and the cavalry crossed the bridge to be slaughtered at the hands of the highly motivated Scots. The hated Cressingham was among the fallen English on that day, and it is well known that, after the battle when his obese corpse was discovered among the dead, the Scots mutilated his body and stripped it of his skin. The Lanercost Chronicler maintains that, "Of his skin William Wallace caused a large strip to be taken from the head to the heel, to make therewith a baldrick for his sword." How de Moray received the fatal wound he incurred during the battle is not recorded, but it is known that he lived for several weeks after the battle. Nor is it on record that he attended the Scottish council at Perth in October where he and Wallace were jointly named "leaders of the army of the realm of Scotland." Both received their knighthood at around this point also, presumably in recognition of their services to Scotland at this fatal juncture. It was also during this period that the famous letter bearing both leaders' signatures went out to the mayors of Lubeck and Hamburg, informing those cities that Scotland had been "recovered by war from the power of the English". Her ports were once more open to the trade which had flourished prior to Edward's usurpation. Two additional letters under joint signature went out from Hexham on 7th November 1297. In all three letters, the order of the names appears the same: "Andrew de Moray and William Wallace, leaders of the army of the kingdom of Scotland." The name of Andrew de Moray no longer appears after this date, and it is to be assumed that he died shortly thereafter. Wallace left to carry the war to the English. Andrew's father and uncle were still held in the Tower of London during the revolt in the north, both of them dying there under conditions of extreme severity imposed by Edward. Another of young Andrew's uncles served the rebellion admirably in the person of David de Moravia, who, as a member of the "church militant" rose quickly from a parson of Bothwell in 1296 to Bishop of Moray in 1299. He figured prominently, along with Bishop Lamberton, in the story of Robert the Bruce. And, finally, de Moray left a son who fought valiantly and effectively against Edward III when he renewed his grandfather's quest to reduce Scotland to a vassal state of England. There is no doubt that Andrew de Moray, had he lived to continue the struggle, would have shared the spotlight with Wallace, and perhaps even have eclipsed Wallace as the leading hero of the Scottish War of Independence. He is directly responsible for the heroic uprising in the north, indirectly responsible for the overthrow of the English in Aberdeenshire, and one of two great leaders who defeated English chivalry at the Battle of Stirling Bridge. |
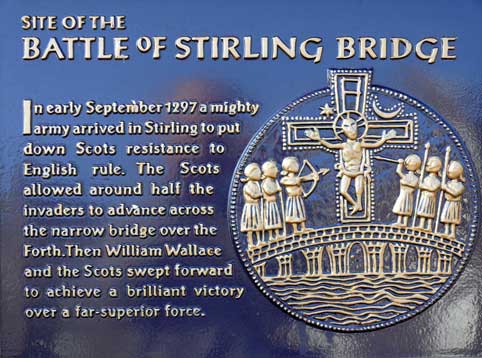 |
I've always thought it quite sad that Andrew de Moray's name isn't on this plaque!! |
Information derived from "The Scottish Wars of Independence", by Evan Macleod Barron, published in 1914. |
 |
© Paisley Tartan Army 2008-09